簡體 | 繁體
loading...
海外博客
    • 首頁
    • 新聞
    • 讀圖
    • 財經
    • 教育
    • 家居
    • 健康
    • 美食
    • 時尚
    • 旅遊
    • 影視
    • 博客
    • 群吧
    • 論壇
    • 電台
  • 熱點
  • 原創
  • 時政
  • 旅遊
  • 美食
  • 家居
  • 健康
  • 財經
  • 教育
  • 情感
  • 星座
  • 時尚
  • 娛樂
  • 曆史
  • 文化
  • 社區
  • 幫助
您的位置: 文學城 » 博客 »How to Recharge Your Car A/C in 15 Minutes(ZT)

How to Recharge Your Car A/C in 15 Minutes(ZT)

2017-03-28 08:44:17

soccer88

soccer88
首頁 文章頁 文章列表 博文目錄
給我悄悄話
打印 被閱讀次數

How to Recharge Your Car A/C in 15 Minutes


Get your car in shape for summer and beat the heat with these easy steps.

Cost

$      

Skill Level


Start to Finish

½ Day

Tools

  • PSI Pressure Gauge
Show All

Materials

  • car A/C charge kit with proper refrigerant for your vehicle
  • UV kit (optional)
Show All
Like this? Here’s more:
Maintenance Repairing
By: Dylan Eastman
 
Pinterest
 
 
Facebook
 
 
Twitter
 
 
Email
 

Introduction


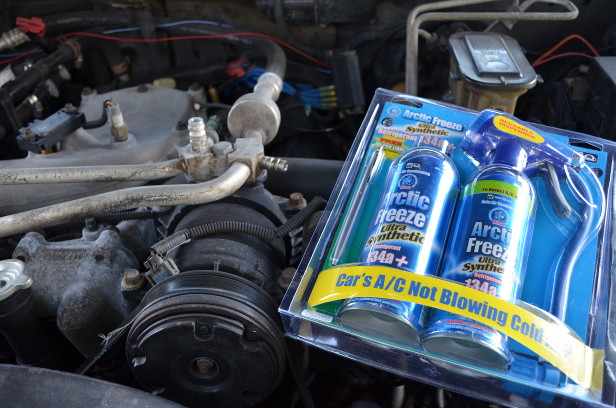
First, purchase a charge kit for your car. Consult your local auto parts store for the appropriate type of refrigerant. The common off-the-shelf refrigerant is R-134 which became mandatory in the 1995 model year as R-12 was phased out due to its ozone depleting characteristics. If you have a vehicle made between 1992-1995, you may have either R-12 or R-134. If your vehicle does have R-12, it has to be converted to use R-134 which is a job best left to an A/C mechanic to handle. In my case, my 1996 truck took R-134 and I needed two cans for the size of the system.

Pro Tip

For a few bucks more, get a kit with the UV dye as it will greatly assist in tracking down minor leaks.

Step 1
Find the Low Side Port

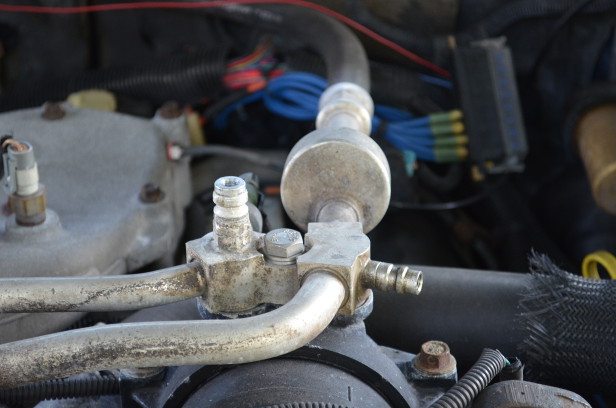
Next, find the low side port of your A/C system. This will be the barb on the larger tube between the compressor (mounted to the engine and with a belt) and the evaporator (a large aluminum can). If in doubt, consult your service manual or local parts store.

Step 2

Attach Can of Refrigerant

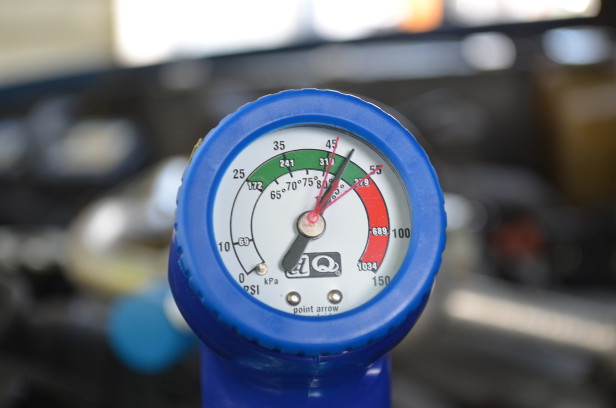
Screw the dispenser hose and gauge onto the can of refrigerant. Attach to the low side port by pulling back the outer slip ring, pushing it on, and releasing the ring. Next, start the engine, turn the A/C system on max, and check the gauge reading. The compressor clutch should be engaged and the front of the compressor spinning. If the pressure is lower than 20 psi and the compressor is not engaged, then dispense refrigerant until the clutch engages. Be sure to shake the can first and every 3-4 seconds later.

Step 3
Continue Dispensing Refrigerant

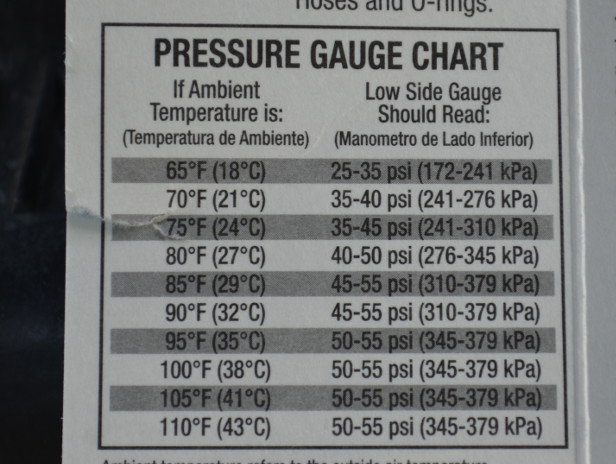
Consult the pressure chart in the refrigerant instructions for the proper system pressure. Continue dispensing refrigerant and rechecking the pressure until the desired level is reached. In my case, with an ambient temperature of 85 degrees, the instructions called for 45-55 psi. Be sure not to over pressurize the system. If you feel like the can is empty, flip it over to dispense the remaining oil before removing.

Step 4

Check for Minor Leaks

If you bought a UV kit, check the system for minor leaks so repairs can be made if necessary. Use the UV pen and examine all valves and junction points in the system. In my case, I found a small spot where the front A/C feeds refrigerant to the rear A/C under the car.

登錄後才可評論.
  • 文學城簡介
  • 廣告服務
  • 聯係我們
  • 招聘信息
  • 注冊筆名
  • 申請版主
  • 收藏文學城

WENXUECITY.COM does not represent or guarantee the truthfulness, accuracy, or reliability of any of communications posted by other users.

Copyright ©1998-2025 wenxuecity.com All rights reserved. Privacy Statement & Terms of Use & User Privacy Protection Policy

今日熱點

  • 簡單的人,做簡單的事喝白開水健康
  • 半夜鬧鬼,我撥打了911GoBucks!
  • 博士後的財務自由之路A-mao
  • (科克遇刺事件) “怎麽說”永遠比“說什麽”更重要sandstone2
  • 愛上有婦之夫mayflower98
  • 房價的再思考——從近期國內房價下跌談起李遠哲
  • 如何應對基金和證券公司的投資建議?矽穀居士
  • 東京日記(十四) 購物美食在銀座快樂玉子
  • 土耳其之旅 - 吐槽紅線導遊亦緣
  • 我的回憶錄-1-06-我會娶她的linjiayu
  • 總統套房長啥樣?謙謙美君子
  • 也談柯克之死與刺客泰勒的命運歸宿江天雲月
  • “西班牙海鮮飯”的趣事袋鼠國Bob
  • 鞋子真那麽重要麽?我現在咋覺得腳才重要布蘭雅

一周熱點

  • 我隱約地看到了未來戰爭的模樣songling
  • 父親去了,這個家真的變成了回憶明了的土垚
  • 維生素 D 的那些事burpeejump
  • 英雄無悔 戰神末路 Kirk之死BeijingGirl1
  • 方便麵漲價了帕格尼尼
  • 簡單的人,做簡單的事喝白開水健康
  • 德國並沒有對中國電車敞開大門, 或者不得不敞開大門京男
  • 女兒和男友打算移民中國了beautifulsunset
  • 人人持槍,真的可以不亂嗎?行者無疆1970
  • 我突然失去了對種菜的興趣mychina
  • 名校ABC博士也失業了GoBucks!
  • 做一個善良、正直的人難啊!我生活著
  • 從《南京照相館》到張純如。。。。。菲兒天地
  • 博士後的財務自由之路A-mao
How to Recharge...
切換到網頁版
soccer88

soccer88

How to Recharge Your Car A/C in 15 Minutes(ZT)

soccer88 (2017-03-28 08:44:17) 評論 (0)

How to Recharge Your Car A/C in 15 Minutes


Get your car in shape for summer and beat the heat with these easy steps.

Cost

$      

Skill Level


Start to Finish

½ Day

Tools

  • PSI Pressure Gauge
Show All

Materials

  • car A/C charge kit with proper refrigerant for your vehicle
  • UV kit (optional)
Show All
Like this? Here’s more:
Maintenance Repairing
By: Dylan Eastman
 
Pinterest
 
 
Facebook
 
 
Twitter
 
 
Email
 

Introduction


First, purchase a charge kit for your car. Consult your local auto parts store for the appropriate type of refrigerant. The common off-the-shelf refrigerant is R-134 which became mandatory in the 1995 model year as R-12 was phased out due to its ozone depleting characteristics. If you have a vehicle made between 1992-1995, you may have either R-12 or R-134. If your vehicle does have R-12, it has to be converted to use R-134 which is a job best left to an A/C mechanic to handle. In my case, my 1996 truck took R-134 and I needed two cans for the size of the system.

Pro Tip

For a few bucks more, get a kit with the UV dye as it will greatly assist in tracking down minor leaks.

Step 1

Find the Low Side Port

Next, find the low side port of your A/C system. This will be the barb on the larger tube between the compressor (mounted to the engine and with a belt) and the evaporator (a large aluminum can). If in doubt, consult your service manual or local parts store.

Step 2

Attach Can of Refrigerant

Screw the dispenser hose and gauge onto the can of refrigerant. Attach to the low side port by pulling back the outer slip ring, pushing it on, and releasing the ring. Next, start the engine, turn the A/C system on max, and check the gauge reading. The compressor clutch should be engaged and the front of the compressor spinning. If the pressure is lower than 20 psi and the compressor is not engaged, then dispense refrigerant until the clutch engages. Be sure to shake the can first and every 3-4 seconds later.

Step 3

Continue Dispensing Refrigerant

Consult the pressure chart in the refrigerant instructions for the proper system pressure. Continue dispensing refrigerant and rechecking the pressure until the desired level is reached. In my case, with an ambient temperature of 85 degrees, the instructions called for 45-55 psi. Be sure not to over pressurize the system. If you feel like the can is empty, flip it over to dispense the remaining oil before removing.

Step 4

Check for Minor Leaks

If you bought a UV kit, check the system for minor leaks so repairs can be made if necessary. Use the UV pen and examine all valves and junction points in the system. In my case, I found a small spot where the front A/C feeds refrigerant to the rear A/C under the car.