正文
做廚房要先做地。要做地就需要決定那種地。其實地麵,台麵,和backsplash應當在最初的設計階段就定下來。定下cabinet之後,下一步是拿著cabinet door sample 區選台麵,然後拿著door sample and countertop sample 區選地麵和backsplash. 第一次做也是搬著石頭過河。雖然在設計階段沒有考慮好,但是心裏有一個大概喜歡的風格。最後結果還不錯。過程是這樣的。
廚房地麵考慮過用竹子,硬木,或tile. 因為廚房open up to adjacent dining room and living room all have hardwood floors, and it is very difficult to match exactly with those floors, we gave up on hardwood. Bamboo floor is green and economical but not sure how mix with hardwood - probably bad, also might hurt future resale value. So that leaves tile and tile has porcelain, ceramic, marble etc. We finally chose porcelain because it is most durable and easy to maintain/clean.
There are two main sources of supplies for tiles. One is homedepot/lowes, the other is tile stores. We visited both. The prices for 16-inch tile vary significantly (from $2.00/sf at homedepot to $10.00+ at tile dealers). The reason for large tiles is that the larger the tile the space feel bigger. There was one from home depot that we liked so its a easy decision for us. The other consideration is that putting an expensive tile floor down probably least able to capture investment at time of resale.
Installation is the hard part. Tile installation used to be one of the most technical jobs in construction. 論壇上經常有人說自己的tile floor有問題,不是裂縫了就是漏水了.這主要是安裝的問題.我用的是Ditra. http://www.schluter.com/6_1_ditra.aspx
主要作用是把tile 和subfloor 分離,這樣房屋的移動不會對tile floor 產生影響.雖然Ditra很貴,about $100 for 80 st, but highly recommend for any fellow DIYers. It also comes with instructions. Read them carefully esp foundation requirement. If using Ditra, only unmodified thinset is recommend. It is also dirt cheap. $4 per bag vs $20+ per modified thinset.
還有一個問題是把整個房間都鋪還是鋪到cabinet邊上.雖然隻鋪到cabinet邊可以省點tile,整個房間都鋪後來裝cabinet就容易多了.
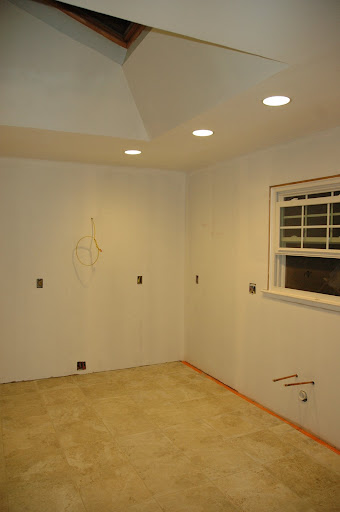
鋪好的地麵:

上麵顏色有點跑偏

掛廚子:先做wall cabinets. make sure measure and note stud locations before dry wall. Screw a long 1X2 for support. Take off the doors first and mark them. Start from corner. Drill and screw the front of adjacent cabinet to make sure face flush. Need a helper.

Added 1X2 filler on top of cabinets as anchor for small mouldings. 42-inch cabinets don\'t go well with large mouldings.


First sets of cabinets were up!

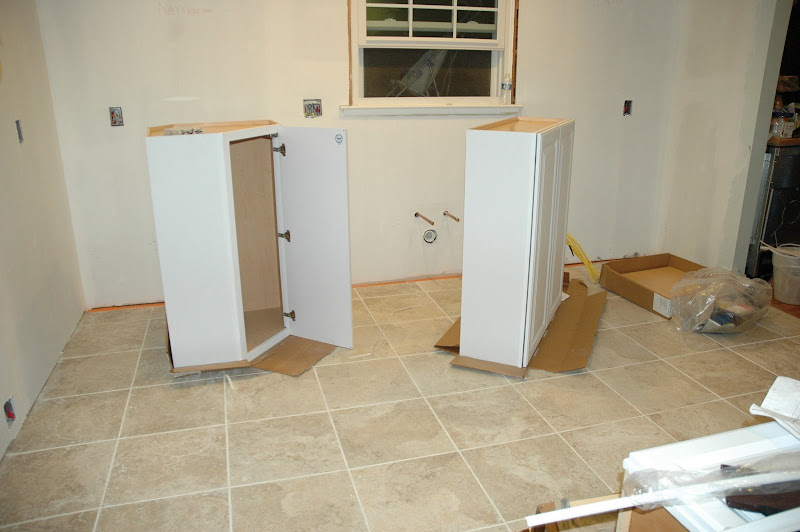
Then base cabinets:

Make sure they are level:

Level in different directions:

Cabinets are in!


Appliances: dishwasher, wine cellar, range & hood


Hood and vent installation was a pain. Had to go to attic and open a hole in the ceiling....

Another look


Island in - here is a great tip from the designer. Island is the most expensive part of cabinets set, because everything needs to be finished. But wall cabinets can be used to screw together for island, cost significantly less.

Plumbing at this stage: another great tip from plumber --> Run ice maker line before putting in base cabinets. This way don\'t need to drill holes in the cabinets later on. Here I used poly ice maker line. Would use cooper next time. Found out cooper more durable after putting poly in.

Now could use some help on deciding which backsplash to use. Which one would you vote for, A or B?
A: fusion glass mosaic

B: glass, marble mix mosaic

廚房地麵考慮過用竹子,硬木,或tile. 因為廚房open up to adjacent dining room and living room all have hardwood floors, and it is very difficult to match exactly with those floors, we gave up on hardwood. Bamboo floor is green and economical but not sure how mix with hardwood - probably bad, also might hurt future resale value. So that leaves tile and tile has porcelain, ceramic, marble etc. We finally chose porcelain because it is most durable and easy to maintain/clean.
There are two main sources of supplies for tiles. One is homedepot/lowes, the other is tile stores. We visited both. The prices for 16-inch tile vary significantly (from $2.00/sf at homedepot to $10.00+ at tile dealers). The reason for large tiles is that the larger the tile the space feel bigger. There was one from home depot that we liked so its a easy decision for us. The other consideration is that putting an expensive tile floor down probably least able to capture investment at time of resale.
Installation is the hard part. Tile installation used to be one of the most technical jobs in construction. 論壇上經常有人說自己的tile floor有問題,不是裂縫了就是漏水了.這主要是安裝的問題.我用的是Ditra. http://www.schluter.com/6_1_ditra.aspx
主要作用是把tile 和subfloor 分離,這樣房屋的移動不會對tile floor 產生影響.雖然Ditra很貴,about $100 for 80 st, but highly recommend for any fellow DIYers. It also comes with instructions. Read them carefully esp foundation requirement. If using Ditra, only unmodified thinset is recommend. It is also dirt cheap. $4 per bag vs $20+ per modified thinset.
還有一個問題是把整個房間都鋪還是鋪到cabinet邊上.雖然隻鋪到cabinet邊可以省點tile,整個房間都鋪後來裝cabinet就容易多了.
鋪好的地麵:
上麵顏色有點跑偏
掛廚子:先做wall cabinets. make sure measure and note stud locations before dry wall. Screw a long 1X2 for support. Take off the doors first and mark them. Start from corner. Drill and screw the front of adjacent cabinet to make sure face flush. Need a helper.
Added 1X2 filler on top of cabinets as anchor for small mouldings. 42-inch cabinets don\'t go well with large mouldings.
First sets of cabinets were up!
Then base cabinets:
Make sure they are level:
Level in different directions:
Cabinets are in!
Appliances: dishwasher, wine cellar, range & hood
Hood and vent installation was a pain. Had to go to attic and open a hole in the ceiling....
Another look
Island in - here is a great tip from the designer. Island is the most expensive part of cabinets set, because everything needs to be finished. But wall cabinets can be used to screw together for island, cost significantly less.
Plumbing at this stage: another great tip from plumber --> Run ice maker line before putting in base cabinets. This way don\'t need to drill holes in the cabinets later on. Here I used poly ice maker line. Would use cooper next time. Found out cooper more durable after putting poly in.
Now could use some help on deciding which backsplash to use. Which one would you vote for, A or B?
A: fusion glass mosaic
B: glass, marble mix mosaic
評論
目前還沒有任何評論
登錄後才可評論.


