老烤肉,從靜止急速啟動加速,雙側刹車方向有噪音。左側輕,僅出現在直線急加速;右側重,直線和右轉特急加速都有噪音。但車速超過5mph後,任何急加速都不會再有噪音。
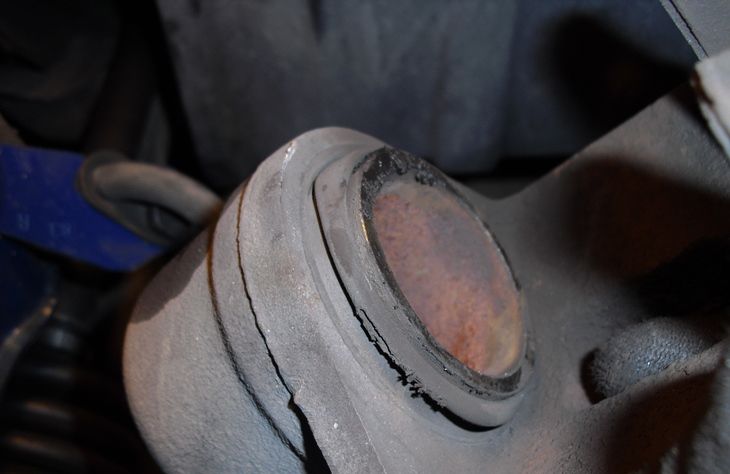
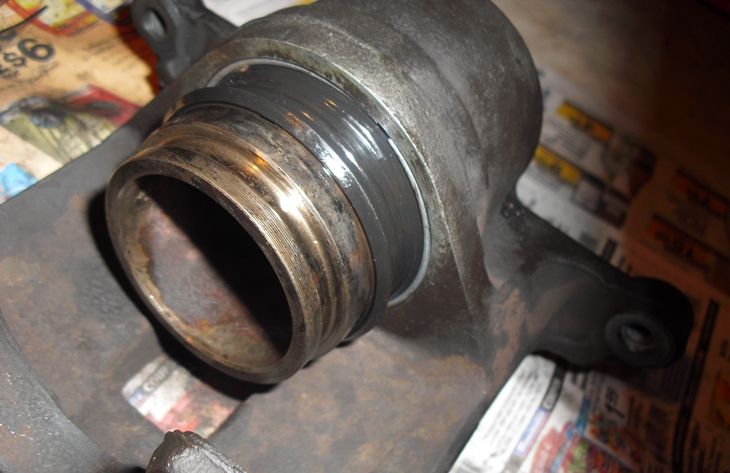
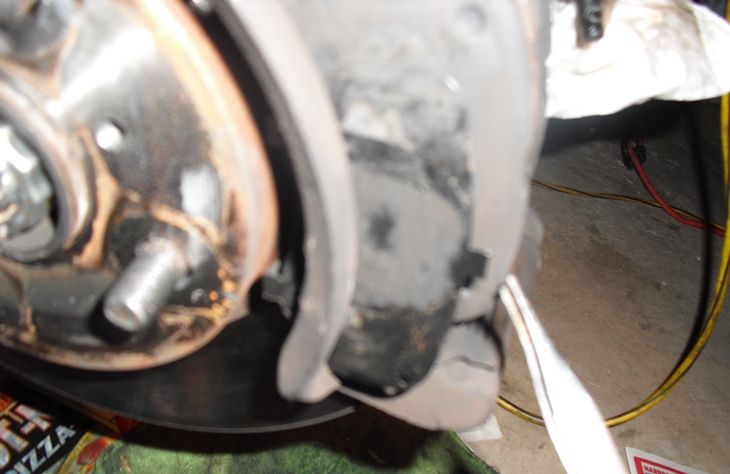
打開caliper檢查piston。boot損壞。這是噪音嚴重的右側。boot破損變形,piston邊緣還有輕微摩擦痕跡。明顯piston運動不暢。
左側一樣,程度略輕。
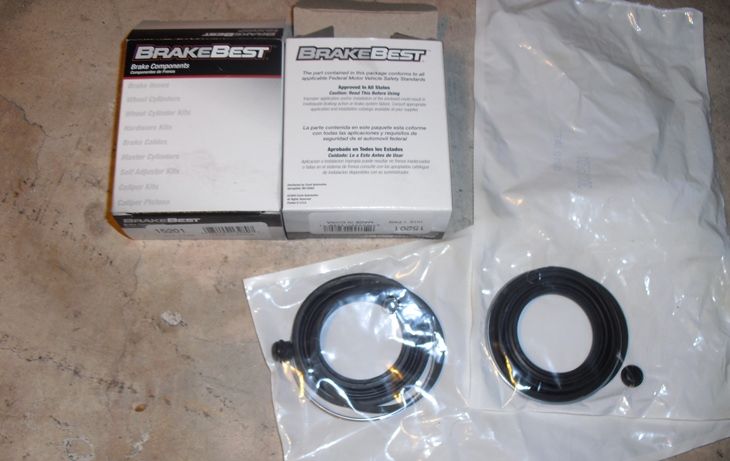
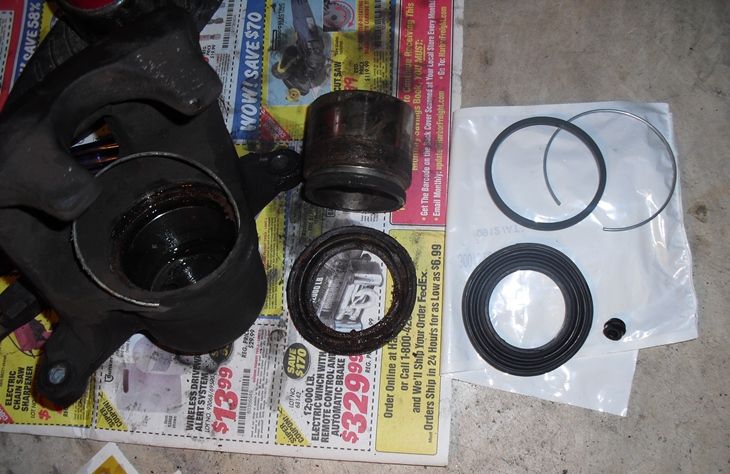
買倆caliper rebuild kit,6-7塊錢。比買60-70刀的caliper更有吸引力。決定先rebuild,不行的話再考慮買新的caliper。
噪音比較嚴重的右輪。拆。
拿下。刹車皮磨損均勻。

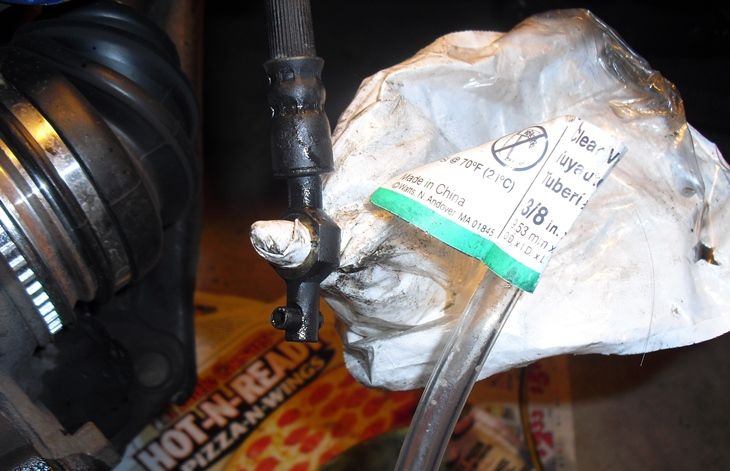
刹車液管道拆下,堵住。手冊說用橡皮管,我沒有。找根3/8寸塑料管,裹上塑料袋湊合。
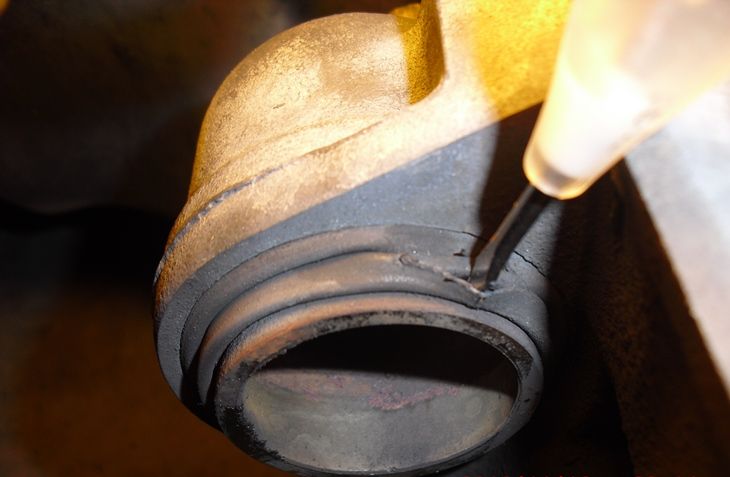
崩piston,沒有氣泵,隻好土辦法。先試試打氣筒,太費勁。打了不下40-50下。

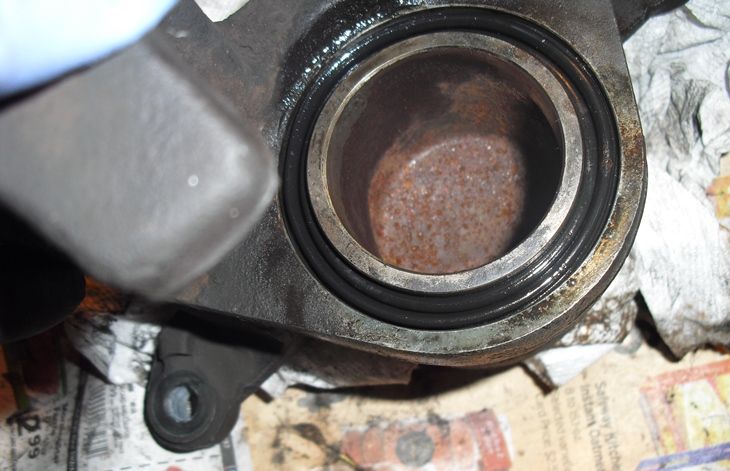
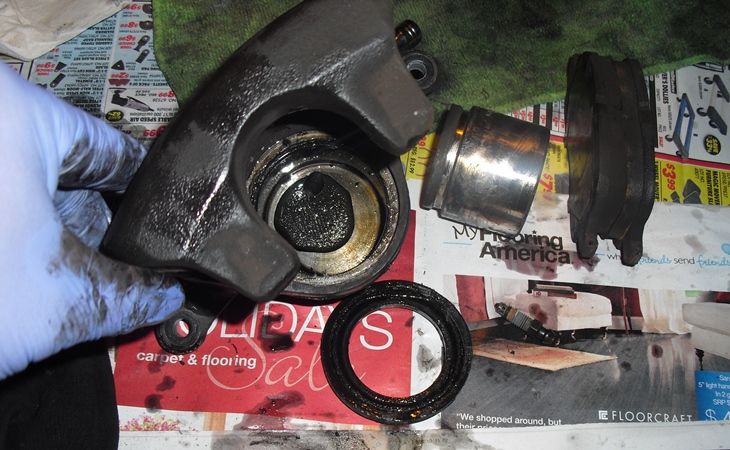
出爐。很髒,大量灰塵和鏽跡沉積,導致運動不暢。
噴,刷,擦。全麵搞幹淨。
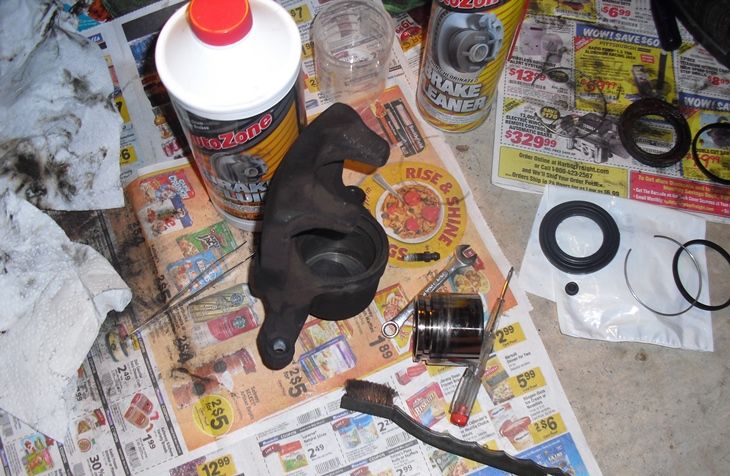
piston表麵雖然還有點痕跡,但比原來平滑多了。決定先湊合用,看看效果。一個新piston大約要10-20刀,暫時不考慮。
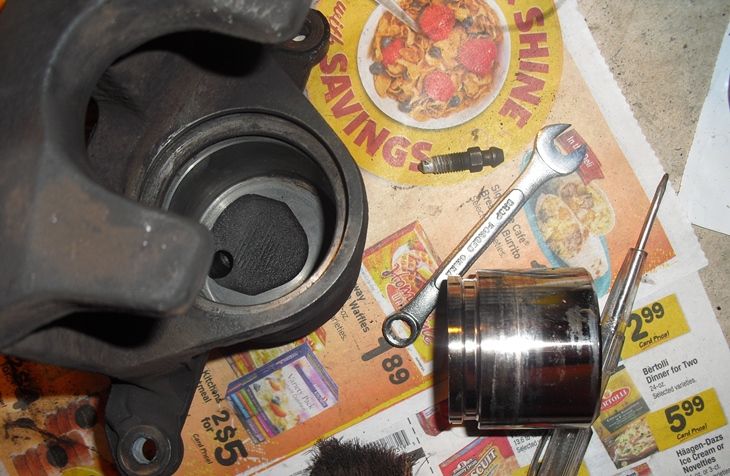
先O ring,後boot。boot clip可以跟boot一起上,也可以最後再上。全程反複充分用brake fluid潤滑。
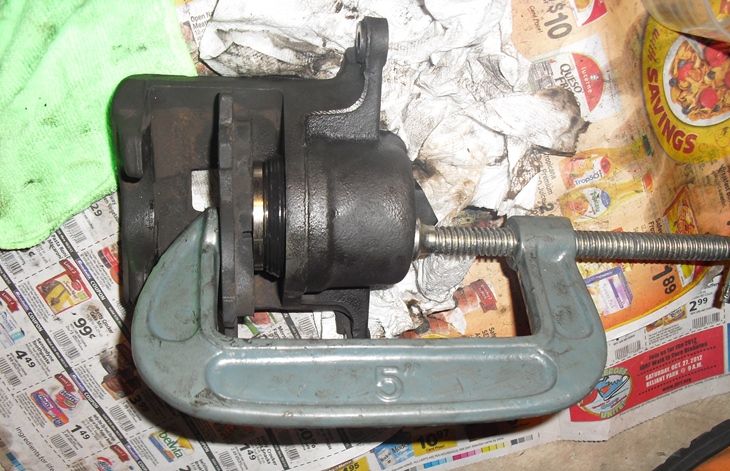
複位。關鍵是要對正和壓力均勻。如果感覺使了很大力氣還不前進,說明有偏差,調整C clamp位置再繼續。應該不是很費勁。如果有brake piston tool kit,會更容易。
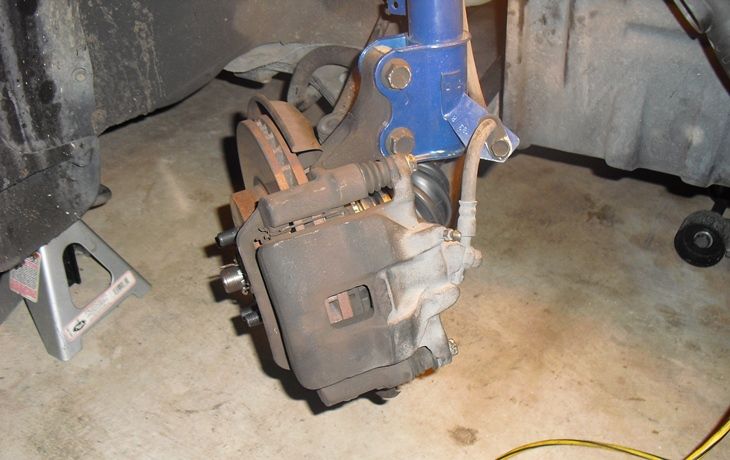
右側完工。最後檢查,清潔。安裝。
碰巧看到別人提過的問題,順便提一下。看到rotor上這道摩擦痕跡?
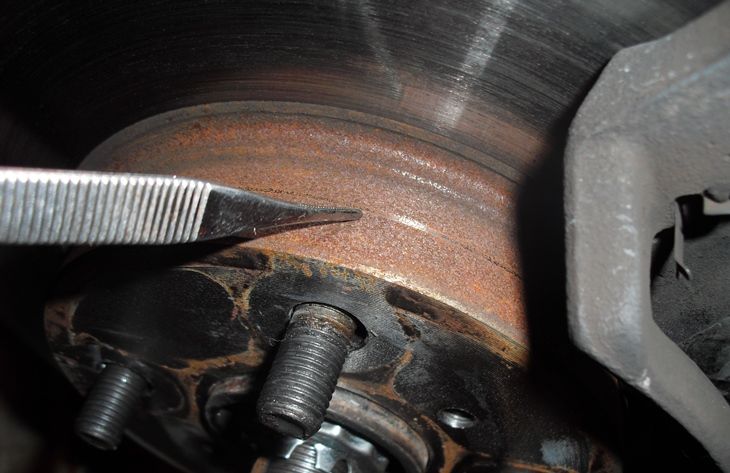
brake pad,有些背麵帶一張薄鐵片,叫shim。固定很不牢靠。如果shim的固定變形或斷裂,這塊shim墜下來,就會在接觸的地方產生磨損。不嚴重的話,把shim拆出來扔掉就行了。
左側,這次放炮改用電動氣泵,省力氣多了。注意安全和襯墊piston。確實跟放炮一樣,piston緩慢滑出,最後一刹那,彭的一響。大概是活動不暢導致。

噪音輕微的左側,相對幹淨很多。piston清理後也更加光滑。
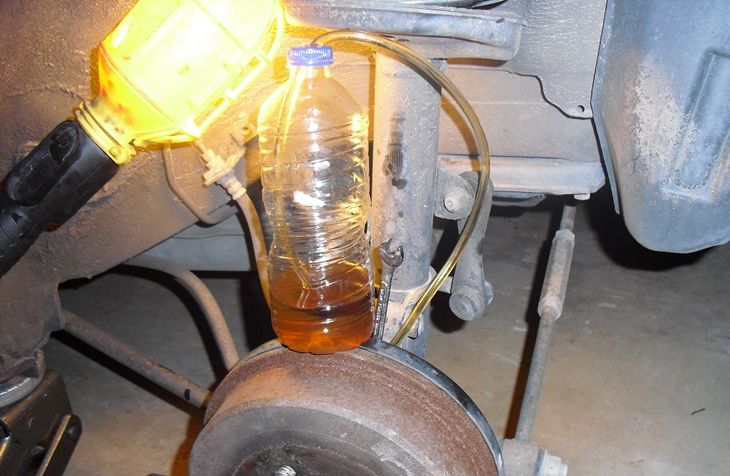
完工後,bleeding空氣。有興趣試驗了一下單人簡易放血,咦?好像很簡單很有效。把瓶子放在高處,似乎更有利於排氣和防止空氣回流。另外就是單人持續操作,注意踩刹車次數控製好,避免把前邊reservoir裏放光了。
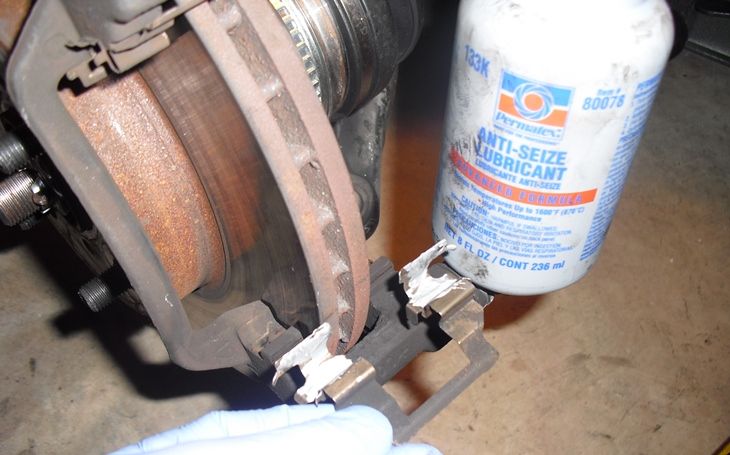
搞點anti-seize在需要潤滑的部位。
完工。試車。噪音原來較輕的左側,噪音消失。右側仍有噪音,但明顯減輕。可能還是因為那個piston不夠光滑。不過感覺沒必要換了。其實從靜止加速,我是從來不會那麽快加速的,所以本來我就不大聽到噪音。隻有測試噪音的時候,才需要故意製造極快加速的動作。各位經常開車的,應該知道什麽樣的人才喜歡在靜止狀態下大腳加速,拿個破烤肉當賽車開吧~~
請閱讀更多我的博客文章>>>